Tuesday 13 December 2016

Evaluation for Unit 1


Link to the presentation is HERE

Objective
To conclude the units of work by evaluating your completed work for unit 1.

Task
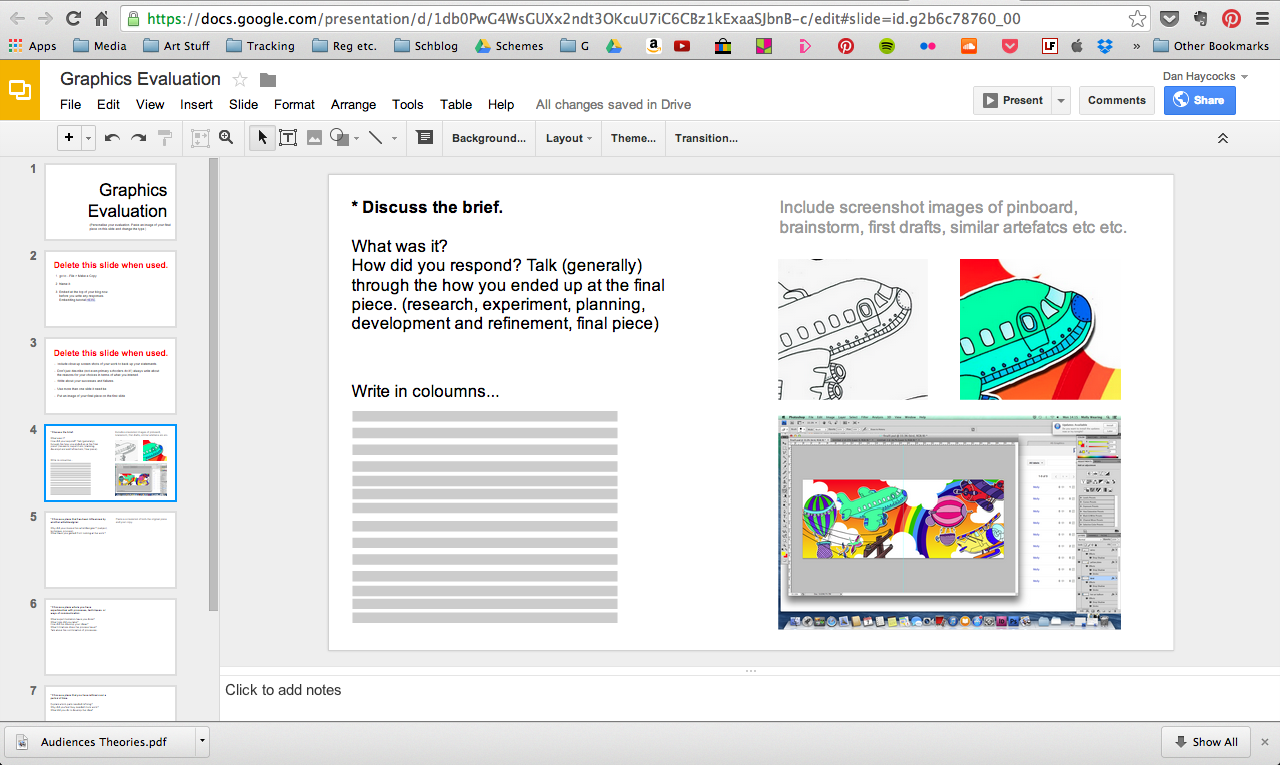
Scroll through the slides for instructions and questions.
I have included all of the questions needed on the separate slides. Feel free to use more. 

Presentation
Add to the end of 


Checklist for assessment
Relevant screenshots of work, insightful observations about the completed work.
'A' grade example is HERE

Time needed
3 Hrs

Deadline
Thursday 29th of Jan.

Example of discussing the brief.
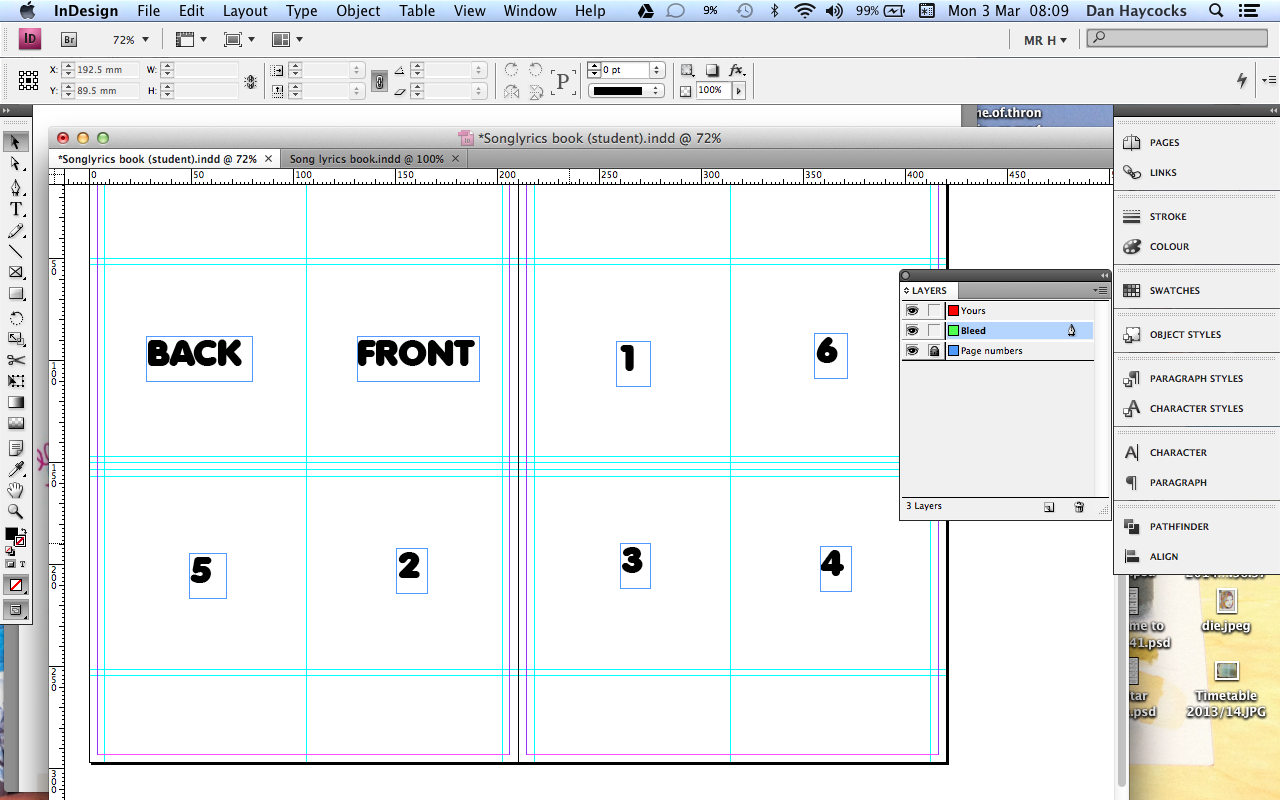
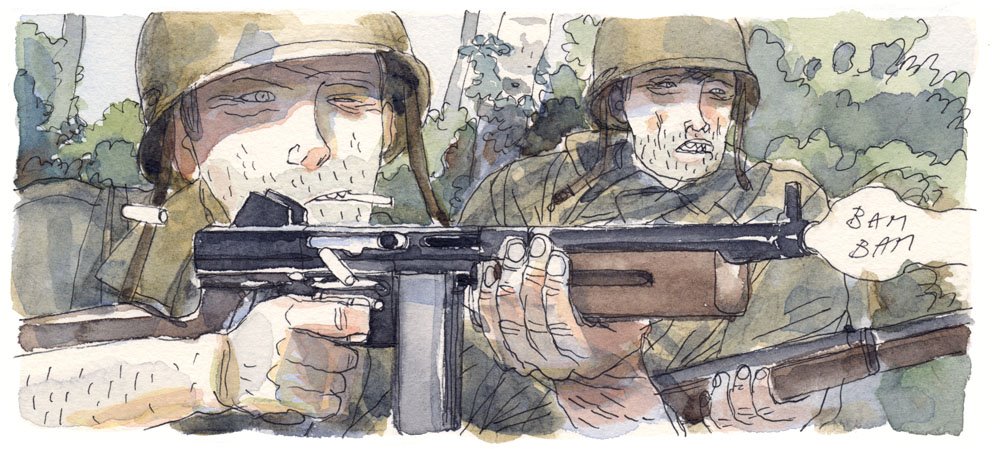
The set brief was to create a book cover for the Steinbeck novel 'Of Mice and Men'. The book was discussed and a proposition was drawn up. The main themes of the book include dreams and loneliness. The role of the design will be to communicate and hint at the theme and provide an enigma to stimulate the curiosity of the audience. The client has stipulated the size of the template.

Tuesday 29 November 2016

Final Draft


Objective
To refine the design process once more.
To gain marks for assessment objective 2.


Task
Draw a pencil (or digital) design that is as close to what your final design will look like. Work at the same size as the final artefact.
Remember, this is the whole design not just the front. e.g. if you and making a book cover, include the spine and back.

Presentation

Sketchbook page or Photoshop onto GSlides.

You will be graded on

Slight changes in terms of refining your design. This could be moving text, changing the size of an element, altering the rendering of an aspect, etc etc.

Time needed

2 hrs

Deadline

TBC

Tuesday 22 November 2016

Analysis


Over the next few weeks you will be completing an analysis of relevant artefacts. You will be given certain slides to complete each hwk session and we will learn / revise the relevant elements each lesson.

Objective
To increase your understanding of the processes and techniques designers employ when creating artefacts. 

Task
Choose artefacts that are similar to the one that you are designing.
Add slides to your existing presentation. Title slide should state that it is Analysis.
Using the questions on the slides above you will be analysing the layout, colour, typography etc. 

I have also included a wealth of key terms for you to use. They are located at the bottom of the post or you can print them off HERE.

Presentation
Google presentation

Checklist for assessment
All points must be covered in detail. For those looking for A/B grades, there will also be some inclusion of further, self-initiated investigation.

Deadlines
13 Oct - Similar artefacts
20 Oct - Content (Poetic and Pragmatic)
31 Oct - Typography 1
03 Nov - Typography 1
10 Nov - Layout, Hierarchy, and Grids
17 Nov - Colour 
22 Nov - Rendering and process

Deadline for all analysis - 6th of Dec.

These presentations are examples of the sort of detail needed for your analysis. The layout is also pretty good.

Holly's A* analysis  CLICK HERE


Thursday 20 October 2016

Emulation (imitate)


Objective
To allow you to look closely at work that you like and that is relevant to your process.
To push your process and technique into new areas.

Tasks
You will produce two pieces.
1 Copy (already completed!)
Find an existing piece of work that utilises a style, process or technique that could be used to get your idea across. (This doesn't have come from a book cover / game cover / coffee pack or digipak.)
Copy the piece in the same medium as the original. Get as close as you can.
2 Then emulate
'Work up' a scamp / refined draft or character using the same process and techniques. 

Presentation
Google slides for digital and sketchbook for traditional.

Time needed
5 hrs

Deadline
tbc

Tuesday 20 September 2016

Typograhy


Task
Learn and revise these terms for a test on Tuesday the 27th of Sept.

Digital Type


Objective
To research a range of type choices available for your artefact.

Task

  • Using Dafont (or other free online type libraries), gather together a range of typefaces that could be used as part of your artefact. 
  • Go for obvious and the not so obvious to give you something to talk about when analysing their suitability.
  • Do two things: Firstly, discuss the way that the typeface looks, why would it be suitable or not suitable? Why? Is it hard to read (legibility)? or is it too mordern? too masculine? too feminine? too much fun? too serious? etc etc. Then, describe some of the type attributes - on the baseline?, ALL CAPS? serif or sans serif? long descender? handwritten? textured?  
  • If you are stuck, use THESE CARDS  THESE TYPE TERMS and search THIS SITE and include as many as you can. 
  • Speaking the language will help you communicate better and score more marks.
  • For extra points, place your type choices on a refined draft and evaluate them in place. Try maybe six?

Presentation
Either print off a sheet of examples and write your comments around the edge or complete in Photoshop / Google Slides (use a  JPG - as you can't add downloaded typefaces to Google slides.)

Checklist for assessment
Lots of interesting and relevant type choices.
Informed annotation.

Time needed 2 hrs.

Wednesday 6 July 2016

Hand drawn type


Objective

To create a suitable typeface for your chosen design.
To evidence your understanding of the expressiveness of typography.

Task

Over two double pages of your sketchbook, experiment with hand drawn typefaces that could be used within your design. This could be a title or another graphic element.
You can work in colour or black and white. Leave in your mistakes.
Look on my Type Pinboard for inspiration... (HERE)

Presentation

Photograph or screenshot your progress.
Post to your blog.

Checklist for assessment

4 pages of experiments, beautifully bustling and busy pages of creativity.

Time needed

2 hrs.

Deadline

Only to be attempted when all other tasks are up to date.


Photos - Contact Sheet


Objective
To gather further primary research for your unit 1 project. 

To enable those who feel drawing is weak to collect useful primary research.   
Within the mark scheme, AO3 states: 'Record ideas, observations and insights relevant to their intentions in visual and/or other forms.'

Task
1. Consider the subject matter for your project. Take a collection of 30+ images that you could either edit and use in the final artefact or just use as drawing/illustration reference.
To get the best results form this task, be as creative as you can with your subject and composition. 
As an example, if you have a wise old wizard in your book—and don't have a wise old wizard to hand—dress up your friend/dad/self in a bed sheet, cardboard hat and long stick. Pose them in different, relevant positions. 
Or, look on YouTube for tutorials about how to create wise old wizard make-up. There are loads of tutorials (plenty on zombies) on make-up. Make sure you then photograph the 'making of' period.
You will get plenty of good results from using your initiative. 
Do not make excuses as to why you couldn't get interesting images, there is no excuse.

2. Screen shot the collection of thumbnail photographs. (see presentation above)
Open in Photoshop (or print off and write on the paper) and annotate -
  • Circle image that are good. This might be due to them being in focus, correct composition etc. 
  • Cross out images that are not to be used. Out of focus, badly cropped, wrong position etc. 
  • Write simple notes against the photos, 'out of focus', 'too far away' or 'too dark', 
  • Make your annotations obvious - write in pink? 
Within the contact sheet presentation, comment on the following:
  • What were your intentions for the shoot? Why take these images? 
  • What are the successful elements, What worked well? 
  • What were the unsuccessful elements? What didn't work well? 
  • If you were to take these images again, what would you do to make them more suitable? 
  • Do you believe that you have all the shots you need for the project? If not, what others do you need to take? 
Presentation
Either in sketchbook or GSlides

Checklist for assessment

Lots of interesting photographs with concise and insightful evaluative annotations. 

Deadline
First lesson back after the Summer hols.


Thursday 26 May 2016

Subject Matter Drawings


Objective
You will need to evidence that you have looked hard at the world around you. You can do this by drawing from life, your own photos or web reference (pin boards?)


Task
Create sketchbook pages full to brimming with small / medium sized 'primary' drawings of your subject matter. A students - 4 pages+ / C students - 2 pages / E - students - 1 page.
Primary drawings are direct from photos or real life - not from other illustrators' work.

Presentation
Photograph the pages and post them to your blog. 
Post title- Drawing subject matter.

Checklist for assessment
Full, bustling pages / detail / obvious investment of time / different approaches to drawing

Time needed
2 hrs+

Deadline
Start of lesson, Tuesday 14th June.


Here's a little tip. Don't let your brain trick you into giving up as soon as your reach your first drawing hurdle. Keep on going and make a busy, messy drawing if you wish. Just don't throw away until all avenues have been exhausted. If you are drawing a load of smallish drawings, cram your page with examples. You will be amazed at how effective they look all huddled together.


Thursday 19 May 2016

Conventions of the form


Objective 
To increase your understanding of the elements needed to create a successful artefact. The 'form' relates to the artefact that you are making for unit 1. Graphics products have various 'forms': game covers, packaging, magazines etc.

Task 

In any medium you wish (by hand in your sketchbook, Google presentation etc), annotate one or more examples of artefacts to indicate the elements that are typical included.

If you find that there is not much on a single digipak or book cover, use a few different examples - especially if you are aiming for an A or B.


You will get more marks for your own research (Wem library?) But if you are struggling for Children's book spreads there is a link HERE 


Checklist for assessment 
Every element included and a clear, presentation.

Example
Frankie has produced a clear version on children's books HERE

Presentation
Post to your blog straight away — even if unfinished. Size: 720 x 420px

Time needed 

2 hrs

Wednesday 18 May 2016

Scamps of other desginers' work


Objective
To further understand the part white space and layout plays in a graphic artefact.
To become aware of how designers balance elements on a page.

Task
Gather a range of similar artefacts. This can be via Pinterest or your own examples.
Draw them in your sketchbook.
Pay close attention to the light and dark tones—allow your brain to 'threshold' the greys in to either light or dark tones. See my measly example above.
The images above are of magazines - not book covers, or CD Digipaks or Children's book covers but you get the gist.

Remember, you can to look at my PINBOARDS if you are struggling for examples...

Presentation
See my example above.

Checklist for assessment

12 examples.

Time needed
Two hours.

Deadline

?

Friday 13 May 2016

Pinterest research


Objective
To create a space where you can collect research from your chosen project.
To allow easy access to the pinboards from your blog.

Task
Create 3 Unit 1 boards in Pinterest. To begin with you are to pin loads of images on the 'Inspiration' and 'Similar Artefacts' boards. Leave the subject matter one for a while.

Inspiration (stuff you like at the moment)
Similar Artefacts (if you are designing a book cover, this will be full of book covers)
Subject Matter (If your artefact is about fish, this will be full of fish)


Presentation
Create links at the top of your blog for each of the 3 boards. See the image below. If you don't know how to create page links (not posts) watch the tutorial below.

Checklist for assessment
3 linked boards. First two have loads of pins.

Time needed

1 hr.

Deadline
tbc


Thursday 12 May 2016

Brainstorming


Objective
To allow you to retrieve and create a wealth of ideas for your unit 1 project.

Tasks
1. Create a post for the brief. Either copy in my example or write your own.

2. In your sketchbook, brainstorm all of the possible ideas / associations that you associate with your story / lyrics / title / synopsis / brand.
This could be evidenced in many forms:

Children's book cover - print the story out, double spaced and annotate in the margins. Highlight key scenes and subject matter that could be used on the cover.
Game cover - start with a few words in the middle of a page. For Epic City Limits is would write the 'name' of the game, 'city', 'jobs', 'youths' etc. Then, using a thesaurus, branch out with connections.
Digipak - brainstorm the name of the album... and print off lyrics by a similar band or singer and annotate them in the margins. 
Packaging design - Brainstorm the name of the product... and the overall 'feel' or 'message' of the product.

Presentation
Checklist for assessment
Loads of interesting ideas.

Time needed
1 hr

Deadline
Will be after science exam.

Wednesday 11 May 2016

Briefs for Unit 1


Links to the stories below - very short!.
What The Ladybird Heard   /   Winston Was Worried    /    Tiny's Big Adventure   /   Mr Big

Create a Unit 1 Blog


Remember! You don't have to create a new account, just another blog on your existing account. Go to your Blogger dashboard and click on New Blog.

Blog Title: Your name Unit 1 Graphics GCSE
URL: yournameunit1graphicsgcse    .blogspot.co.uk
'Simple', white template.

Then create a new header either by hand or using Photoshop. 900 x 300px.

Tuesday 10 May 2016

Unit one, A* Bogs

Below are links to some Comp 1 Blogs that achieved an A*. Take a look and aim for better!


Frankie   Michael    Holly   Olivia-Anna   Heather

Thursday 10 March 2016

Cut Out Stencil Spray


Objective
To improve handmade skills
To incorporate handmade objects into digital work
To broaden the range of development and experimentation available.

Task
Create a sprayed portrait to work into a magazine cover.
Follow the tutorials below on how to create a stencil spray image. 
HERE is a link to a stencil pinterest board

Presentation
Screenshot and photograph, post to blog. Annotate and highlight key terms.

Checklist for assessment
Original photo, work in progress shots (analogue and Photoshop), final image, annotations.

Deadline
TBC


Get headphones, get comfy and concentrate...

Tuesday 8 March 2016

Illustrator Pencil Tool


Objective
To learn another technique for making images.
To begin an introduction into Adobe Illustrator.

Task

  • Choose another page from your book and find an object or scene that represents your lyric.
  • Draw in pencil in on scrap paper, approximately A6 size.
  • Using a lightbox, 'ink' your drawing using as few lines as you can. Attempt to create lines that vary from thin to thick to thin. Don't 'block-in' larger areas - leave that to Illustrator.
  • Ink 4 or more until you get a great one.
  • Scan and 'place' the scanned drawing into Illustrator. 
  • Then run through the tutorial below... make sure you take and post a few interesting screenshots along the way.

Presentation
Screen shots of WIP, photos of drawings, final, placed in InDesgin. 

Time needed
4 lessons

Deadline
tbc


Start tutorial at 2.39.  That's when I stop waffling.


Tuesday 1 March 2016

Cyanotypes


Objective
To utilise another process for creating images
To attempt an impressionistic, poetic montage. 
Montage = the process and result of making a composite image by cutting and joining a number of other photographs, images, textures and text.
To play with a process that has been around since 1842.

Task
Look through your pages and choose a scene that you wish to illustrate.
Attempt to choose something that isn't just a single image. Instead, you are creating a montage.
Collect images, photographs, textures and text that relate to a single page or consider creating a rectangle (2 squares next to each other) that could be used for your cover. If this is the case, you could include elements from throughout the song.
Create an A4 document in Photoshop and paste your images into it.

Then i'll talk you through the process. 

Feel free to experiment and try more than one attempt.

You will be graded on
Inventiveness when utilising process. 
i.e. being able to consider what the process can achieve andtaking advantage of it.

Time needed
3 hrs

Deadline
?

Tuesday 9 February 2016

Pen Portrait 2


James Gulliver Hancock. HERE

Objective
To complete one of the images for the lyrics book.
To increase skills in digital and  traditional processes—custom colour palettes / colouring line only / blending modes / making patterns / pattern stamp tool.

Task
Scan your drawing. Forgotten? See below—watch until 1.48.
Complete the tutorials below in order

Presentation
Take whole screen shots of process / post with your final design.  


Deadline
tbc


Wednesday 3 February 2016

Pen Portrait 1

Objective
To improve line drawing skills.
To create a single illustration for the song lyrics book.
Task
- Choose a page and choose an image that you wish to use. A portrait would be best for this. If not then use an object from your list.
- Print it off in black and white—A5 size but on an A4 sheet
- Using layout paper (or printer paper if you are on a lightbox) trace the image.
- Then have another go—but do it freehand.
- Look again at the image above—the artist has drawn only the lines, block tone and details—no shading.
- Use a dark felt tip for the thick lines and a biro, fineliner or pencil.

Presentation
Photograph (preferred) or scan to your blog.

Checklist for assessment
tbc

Deadline
tbc

Wednesday 27 January 2016

Six Basic Photo Edits in Photoshop


Objective
To improve your skills when editing photos in Photoshop.

Task
Look to your book plan and choose another image. Using some sourced from the web. Complete the six 'basic photo edit' tutorials below.

Presentation

In one post, put jpegs of your six finished Photoshop examples. State underneath each, which process was used.

Checklist for assessment
Examples should be visually interesting and not just done for the sake of getting them on your blog.

Deadline
tbc


Tuesday 26 January 2016

Post that should be on your blog...


Take a look again at The Perfect Blog to check that you are presenting your work the best you can.
Please ensure that the following work is posted to your course blog. 

  • Page 1 - Photoshop editing 
  • Page 1 - page of drawings / paintings 
  • Page 1 - page of photographs 
  • Page planning 
  • Annotated lyrics 
  • (Xmas card - Final Jpeg) Not compulsory 
  • Type Poster - Final Jpeg 
  • Type Poster - Work in progress (full-screen shots of Photoshop) 
  • Type Poster - Drafting (photos of sketchbook pages) 
  • Type Poster - Research (screenshot of Pinboard) 
  • Business Card - Final design (Photographs) 
  • Business Card - Work in Progress (screenshots) 
  • Business Card - Drafting (photos of sketchbook) 
  • Business Card - Research (screenshot of Pinboard)

Wednesday 20 January 2016

Creating your book - InDesgin Template


Download the template HERE 
If that does't work, try student shared > 01MrH 

Objective
To begin the layout of the lyrics book using InDesign. Printing, cutting and stapling.

Task
Download the InDesign template. 
Place your existing artwork into order starting on page 1. Frame the artwork thoughtfully.
Use your favouring artwork for the front / back spread.
Choose a single, readable typeface for the whole book. Arrange your lyrics on the page in a sympathetic manner.

Presentation
3 Screenshots of work in progress, full screen.
Photos of final printed book.

Checklist for assessment
Pages flow in chronological order / bleed and crop taken into account / typeface has been sympathetically chosen and is easy to read /   

Deadline
tbc

Wednesday 13 January 2016

Painting in the style of Quentin Blake / Gipi


Objective
To improve your understanding of the process involved in watercolour.
To introduce the work of relevant practitioners.

Info
Gipi often paints a set of panels that feature variations on two colours. He may use one colour as the more dominant hue, and use the other for creating tone and texture. This is called using a 'limited palette'.
Look at the image below, he also employs an scheme with low saturation.
A good reason for utilising a 2 colour palette is that the colour scheme will more likely achieve unity. (see the basic Principles on the class wall.) This is also the reason why I have limited the colours available in the watercolours by removing all but the dark earths and the primaries. 
Quentin Blake utilises a range of saturated colour and greys. These colours are then modulated (slight changes) using a darker tone. 
Both painting techniques prefer to suggest movement and visual interest by not slavishly painting 'within the lines'. Utilise the paper tone an doclour as part of thre image.

Task
Mix a muted dominant colour that you can use for your iconography. Don't
worry too much about achieving local colour. Lay the paint on the drawing and allow it to gather in pools. !! Ensure that you leave the white of the paper for the lightest areas !!

Repeat for each of your drawings.

When this is completely dry—use the hairdryer—mix up a good amount of mid tone blue/brown mix. Tone can be adjusted by the amount of water added.

Use this mix to add shadow. Enjoy laying it partly over the previous colour—you now have 4 colors at play in your image.

Mix up a dark tone using the blue / brown—us this for the really dark tones in
your image.

Presentation
Take a photo of your pages and post to the blog.

Checklist for assessment
Loose painting style / layering of paint / white paper left for highest value.

Time needed
40 mins.


s